BNSF GP60M 134
This BNSF GP60M is a customized and detailed Athearn Ready-to-Roll model. I chose to model 134 because I photographed the prototype locomotive in Fremont, California in 2008 during the making of our A Day at Niles program. BNSF GP60M 134 and B40-8W 557 were in charge of the Warm Springs Local that day.
My HO scale 557 is one of the models featured in our HO Weathering & Detailing Volume 3 program. We wanted to end each chapter of that program with run-by shots. I thought a model of 134 would be the perfect companion for 557.
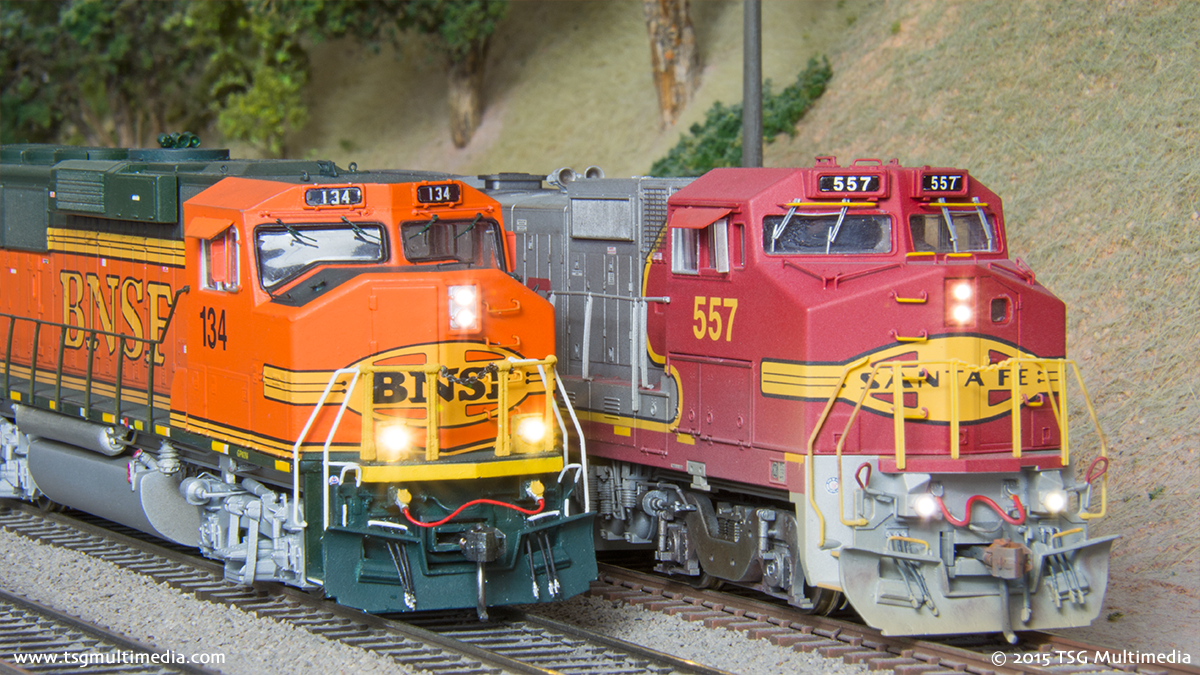
BNSF GP60M 134 and B40-8W 557
I removed the factory lighting and disassembled the model. I got rid of the dynamic brake fan in favor of a Cannon part. I kept the stock “Q” fans in the radiator area since I thought they looked pretty good. I added lift rings and a new air horn to the top of the locomotive.
I cut out the number boards and made new ones that are lit from behind with 603 surface mount LEDs. I got rid of the factory ditch lights and made new ones with Details West castings and more 603 LEDs. The headlight and backup light were redone with 3mm warm white LEDs shining through .040 fiber optic strands with the ends flared to make lenses.
I added diamond plate tread to the walkways. There is no kit for this, so I had to use some leftover Cannon walkway tread from other projects. I also added photo-etched steps over the original plastic steps. I decided to leave the clunky looking plastic step behind the cab door on the engineer’s side since fixing it would have required a lot of surgery and repainting.
After redoing the walkways I found that the original front and rear handrails didn’t fit well and wouldn’t stay assembled. I replaced them with new ones made of brass wire and Precision Scale stanchions. The side handrails are stock.
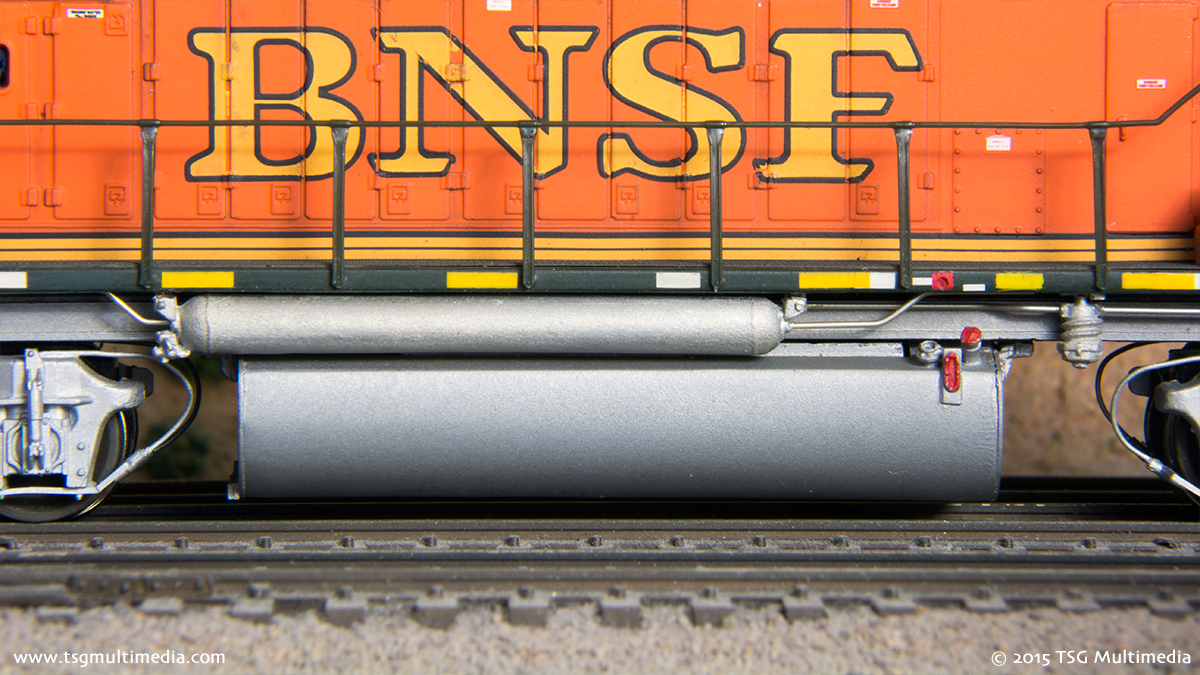
BNSF GP60M 134 – Fuel Tank Area
I spent a lot of time on the chassis and underside of this model. I milled the frame and created new plastic sides to simulate the “C” channel used on the prototype. I added brake and sander lines to the truck sideframes. I cut off the molded on air reservoirs and substituted new parts from Details West. The fuel tank was filed down to square up the ends. I fabricated end caps for the fuel tank from .010 styrene. I also added other details like air filters, fuel fillers and gauges, fuel tank mounts, and plumbing.

BNSF GP60M 134 – Rear Truck
I reworked the handbrake ratchet area extensively. The original body has a shallow indent. I wanted a more realistic brake. I cut out the opening and fabricated a new handbrake recess from styrene and leftover Cannon parts.
I removed the model’s original number using Microscale Micro-Set (blue label). I put some on the number and let it soak. This will eventually start to loosen the numbers without damaging the underlying paint. It takes some patience and repeated applications of Micro-Set. This technique seems to work well on Athearn models at least.
I used Microscale decals to add the new number and to repair the yellow striping in the brake ratchet area. I used more Microscale decals to add the reflector stripes on the sill and other miscellaneous small markings.
Other details on the model include windshield wipers, a new plow, and MU hoses. The model is equipped with a Loksound Select DCC sound decoder.
Comments are closed.